Dutton Kit Cars and their owners
NTS Autoparts fast response vehicle
For those days when your parts just can't arrive quick enough, for sunny days when the transit just isn't 'fun'...
Project X...
Coming soon to a shed near me.
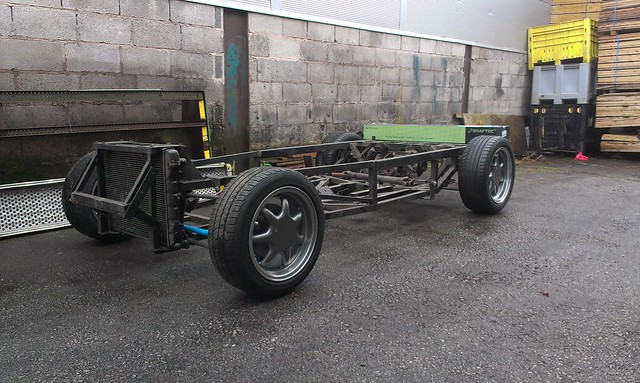
1997 DOHC, weber TC, MT75 box and Sierra fixed 3.72 diff in a Phaeton 3/4 hybrid.
I did some playing on gear calc and the theoretical stats look like this.
| Gear | Mph per 1000 RPM | Mph @4000 RPM | Mph @6000 RPM |
| 1 | 4.91 | 20 | 29 |
| 2 | 9.17 | 37 | 55 |
| 3 | 14.24 | 57 | 85 |
| 4 | 19.08 | 76 | 114 |
| 5 | 23.27 | 93 (buttock clench) | 140 (new pants) |
Add a Comment
-
Comment by Adrian Southgate on November 9, 2017 at 11:49
-
MX5 gearbox mount?
-
Comment by Steve Kerswell on November 9, 2017 at 10:44
-
The correct Link: http://www.fordscorpio.co.uk/mt75.htm
-
-
-
on my Btype struggling with gearbox mount position. Could do with a hanging mount. I'm not sure what part has been wrecked, have had no contact for a while
-
-
Which bit got damaged? I have a few spare bits including the linkage bracket. If it's the casing then :(
I can still get those gearbox mounts new but they cost me about £17 which is why I was looking at making side mounts.
I didn't realise that the Transit had a higher 5th gear... I know that 1st on my 55 plate is useless.
Didn't think of land rover mounts but will have a look, got Mark from APM Duraflex making a pair with extra long bolts as the alloy engine mount on the DOHC is over 30mm thick.
-
-
looking good Ade, mine in the Sierra was a bit far back, but I managed, just. If you need a slip joint for the prop, I have one here in very good order, surplus to my requirements now. Poor Elliot who bought my Sierra had to have new prop made and has damaged the gearbox due to prop bolt coming loose at the doughnut. That box was a good box with the Transit high 5th. gear mod. I did manage to use the escort gearbox mount after some faffing. And I used land rover engine mounts as they were small in height but very hard, almost to hard.
-
-
More progress has now been made.
Engine and box are back together and sitting on trolleys between the chassis rails. Of course there are issues, how could there not be issues.
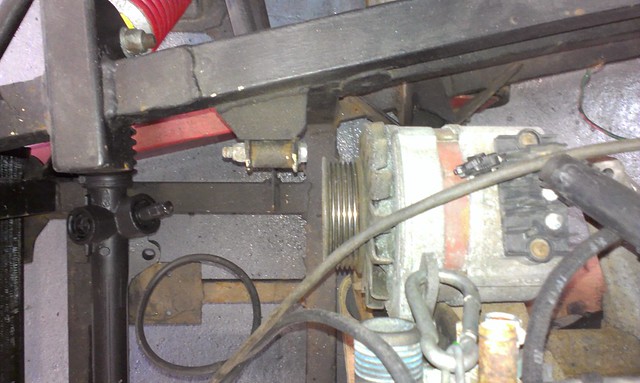
The MT75 is pot bellied, so of course it hit things. Had a play and now it doesn't hit anything but I do need to make some new bits to hold it in place.
Engine mounts need adapting from 45 degrees two bolt to horizontal one bolt so more bits need making.
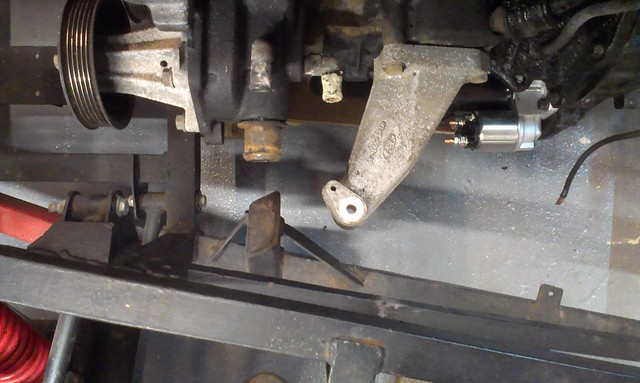
The engine has been moved back in the chassis to avoid fouling on the alternator / suspension mounts at the front.
the gear shift on the MT75 now comes up roughly where my elbow should be. Options dwindled as I looked at the problem, wiggled stuff about and looked again. The only solution seemed to be to move the stick forward by about a foot (sigh)
I looked into alternative gear sticks for the MT75 and found one by Spyder engineering that seems to do what I need. It's bulky and made to withstand a nuclear attack on the gear stick ... sadly it's priced for the lotus elan it was designed to fit :( so I decided to make my own. This is the Spyder engineering one.
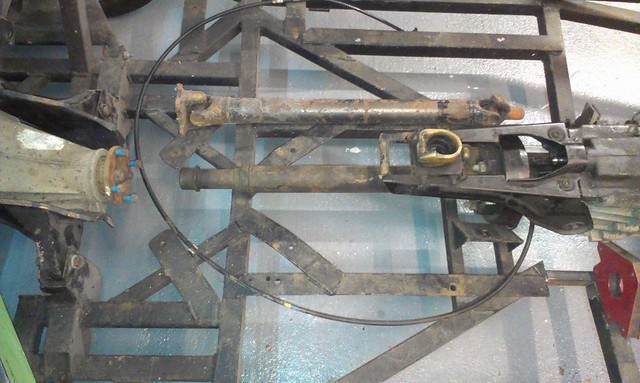
 This is the back end of the gearbox selector mechanism which needs to be moved in and out as well as rotated to select gears.
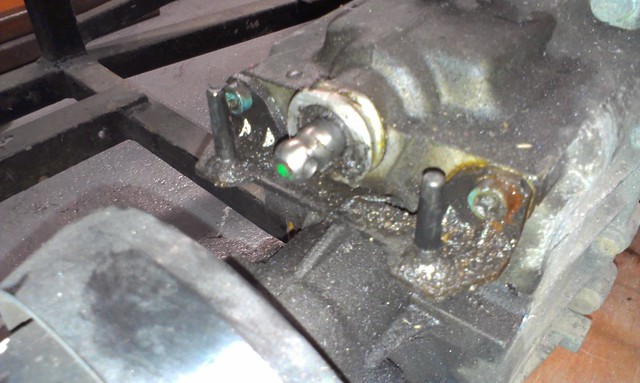
And this is my solution, still have a couple of bits to fettle in place, a link bar welded to the tube on the selector knob which will fit on the bottom of that clevis yoke and a brace between the two diagonals to prevent twisting.
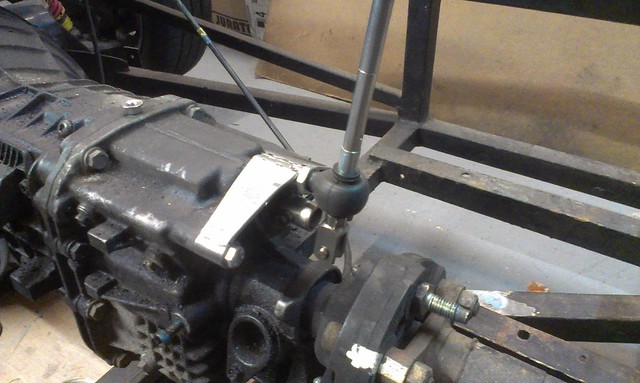
I have removed the large metal 'flywheel' but retained the rubber donut to help keep things smooth. In the picture above you can see the blue bolt sticking out of the side of the gearbox. That's the old mounting bolt for the shifter extension. I may use that as a secondary gearbox stabiliser, there is one both sides.
Parts list.
300mm M8 316 stainless threaded rod.
M8 clevis fork with clip
M8 bore spacer tubes X2
M12 male rose joint.
M12 sleeve nut
M12 half nut (locking nut)
M12 to M8 'top hat' reducers X2
M8 316 stainless sleev nuts X2
M8 Rubber washers X2
M6 'shoulder' bolt & M5 nut / washers
3mm flat stock for diagonals
old bush crush tube and 8mm flat stock to make the critical little bit that joints the shifter to the selector.
Before I put it all together on the box I'll do measurements, diagrams and costings should anyone wish to replicate it. I'm hoping it will give me a nice, accurate gear shift. I will need to make some sort of reverse lock out as the MT75 can be binned into reverse quite easily without it. The rose joint needs to be packed with grease, I've replaced the dodgy broken selector dust cover with a large ball joint dust boot. I'd like to find some sort of cover for the clevis joint too.
That's it for tonight, hope it helps those of you planning to use the MT75 to make it fit under the S3/4, Melos and Legerra.
-
-
Been and done a bit this afternoon. Put all four wheels back on and rolled the beast outside to turn it round.
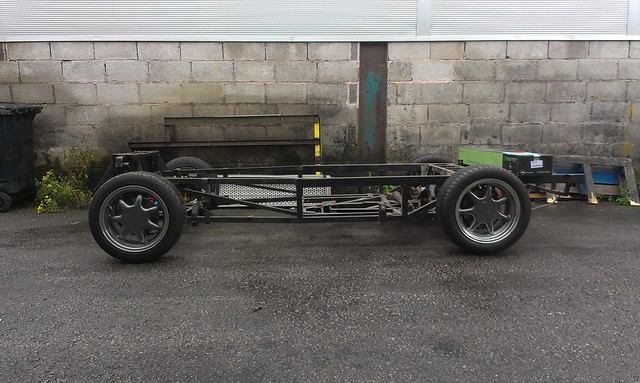
Once it was back in the dry I decided to try the front calipers so dropped the front ones off ... Oops. Calipers bolt on but the discs don't fit. Not enough offset on the disc to clear the caliper. Presume I bought the wrong discs (sigh) Need to go through all the different front disc options now to work out which ones I need.
After that little setback I decided to bolt the engine and box back together and chuck it in the big hole at the front to see if that fitted ... That MT75 is a proper pot bellied box of gears. Even with the engine so far forward that the crank pulley hits the front cross rail, that box isn't a good fit. It looks like I'll have to relocate at least one crossrail either lower under the main chassis (not especially desirable on a low car) or backwards like I did on the Legerra. I'll get some photo's added. Need to see if I still have a haynes manual for a Sierra I guess.
-
Comment by Dave Price on September 13, 2017 at 19:25
-
Ade, if you are thing of bike carbs, I can sort you out a good deal on some bike carbs. I have 3 or may be more sets that currently going spare. Send a message and we can discuss. Dave
-
-
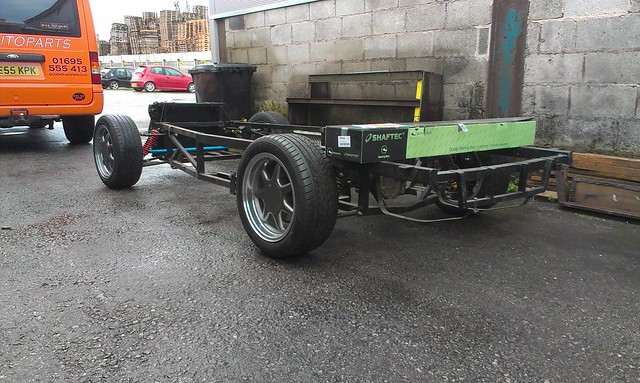
I have decided on tyres for the front rims but as I have a pair of cast off westlakes in the right size they have been fitted just for setting the chassis / engine height. I went for 205/50/15 on the rear and 195/50/15 on the front. It was tipping down so they have yet to be fitted. All four wheels have been tarted up but I wouldn't call them refurbished by any means. They are different, I've not seen many other kits using them.
I moved the engine and box out of the underbench storage area ready to bolt back together so they can then be sized up for mounts, clearance on the sump and cam covers, think it's going to be a snug fit. The original plan was to use a DGAS however this will increase the chance of having to cut the bonnet, something I am trying to avoid. Bike carbs or twin side draughts seem to look a lot more sensible on the Phaeton body. This DOHC is new territory for me as it has an ECU :( Apparently everyone has these now so I suppose i'd better get with the program.
This is the first time I've tried to make a car to fit the image in my head. I was working with more set parameters on the Legerras. This time I feel like I need to do something other than a standard S3/S4. I'll get some pictures of the restoration as it continues. Slow working on two at a time but swapping when you get stuck means no idle hands :)
About
© 2024 Created by Tim Walker (The Bodger).
Powered by
![]()
You need to be a member of DuttonOwners to add comments!
Join DuttonOwners